Bulk Import
Bulk import allows you upload or import many files at once into an Investigation. Bulk importing can work with:
- Files and folders uploaded from a Browser
- Files and folders present in a Video Integration (eg S3, Google Cloud Storage)
- Files and folders present on an Edge Cluster
- Files should be present in the
/mediadirectory on all nodes
- Files should be present in the
Selecting or importing
The first stage of bulk importing is to actually give VisualCortex access to the relevant files. The easiest and recommended way of getting video data into VisualCortex is to Upload files or folders from your web browser. Simply drag and drop files into the dotted area on the screen, or choose Select Files to select files using a file dialog box.
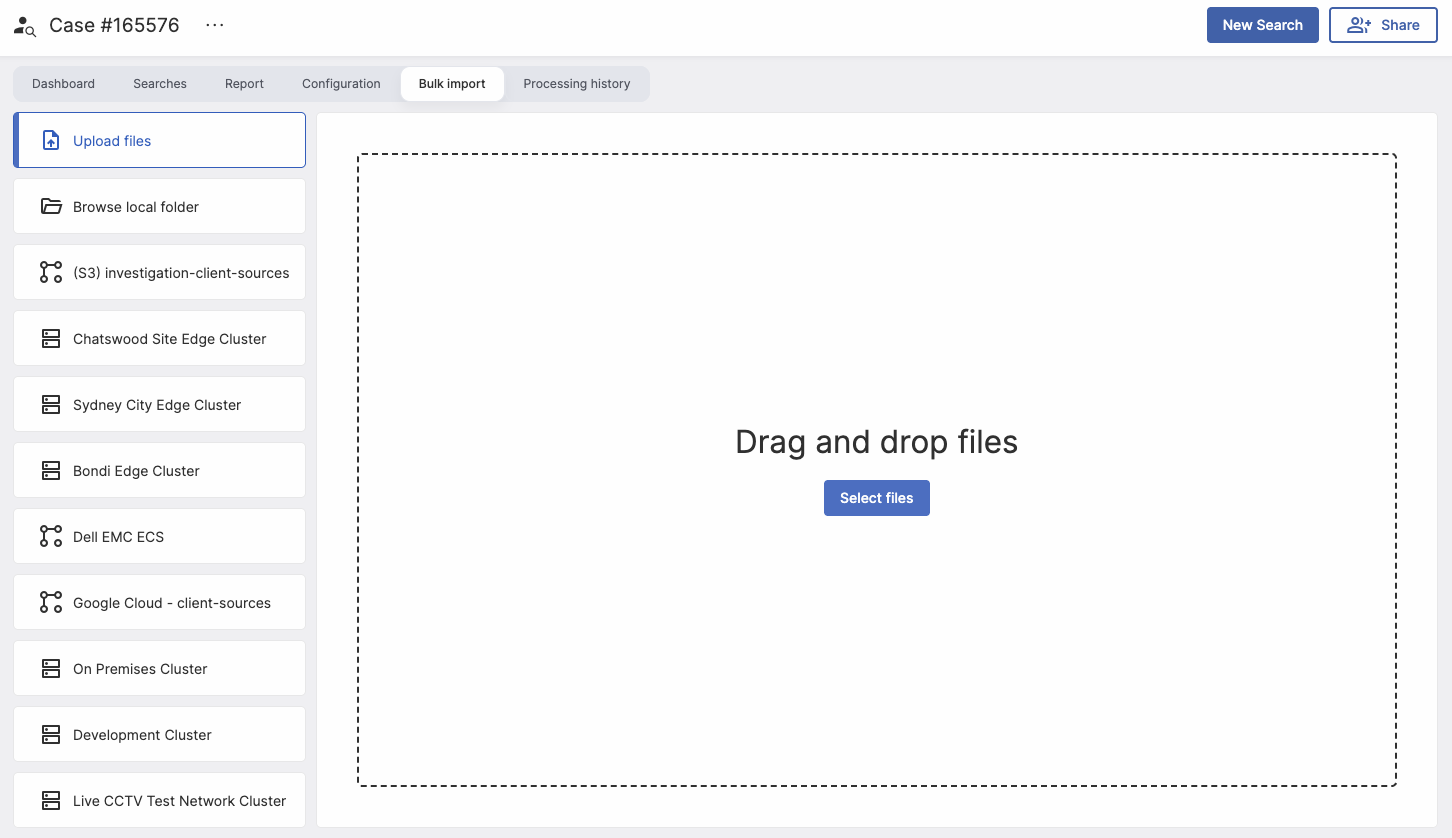
Once you've selected your files, they'll appear on the right hand side of the pane. Add as many as you like, and when you're done, click Set time and start upload.

Importing
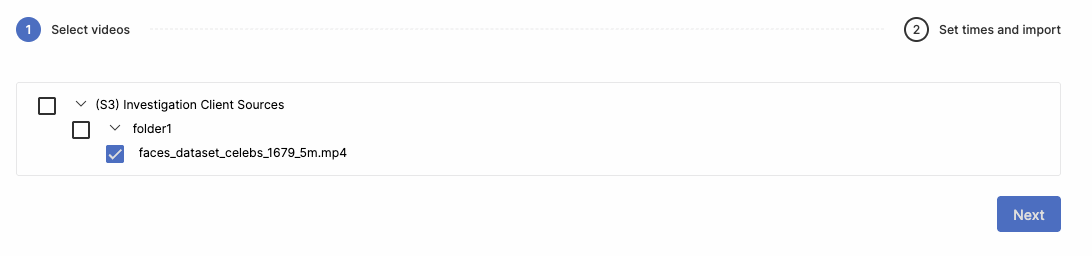
Importing from other sources follows almost the same flow, except you'll get a list of all files and folders that VisualCortex can see in that source. Simply select the relevant assets, and click Next.
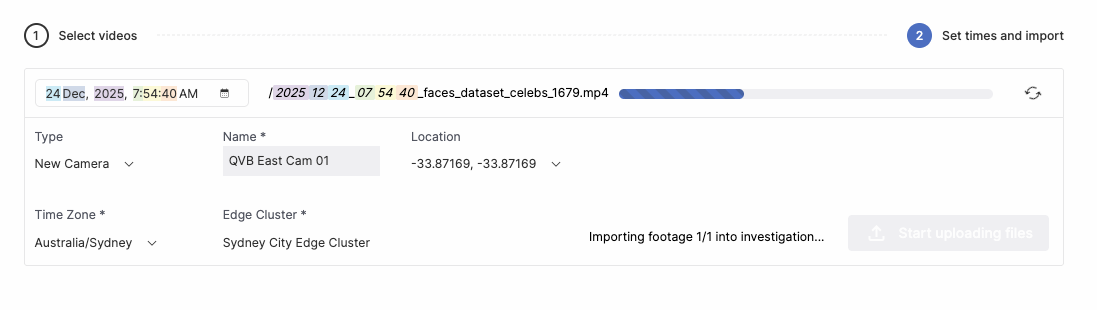
Setting Video Information
In order for Investigations to give accurate information about Archived Footage, VisualCortex needs to know some details. This includes:
- Where the footage came from (Which Camera)
- Optionally, the GeoLocation of this camera
- The Date and Time that this footage was recorded at (including the Timezone)
- The Edge Cluster where you want to process this footage
VisualCortex will automatically try to determine which pieces of footage are from the same camera. It does this by looking at Folder Paths, as well as Filenames. You can change the "grouping" of footage using the on-screen prompts if desired.
Additionally, VisualCortex will also try to automatically determine the Date and Time which the footage was recorded at by looking at the file name. Most Video Management Systems will export footage and include the date and time in the name. VisualCortex colour-codes the time elements that it has detected.
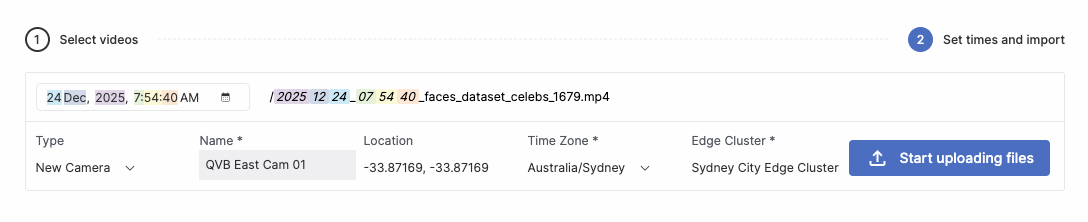
Note: If you're uploading footage to a camera which is already in an Investigation, be sure to choose Existing Camera to avoid having to re-enter all the camera information.
GeoLocation
Cameras can optionally have Geolocation information. Simply search for a location in the search bar and choose an area.
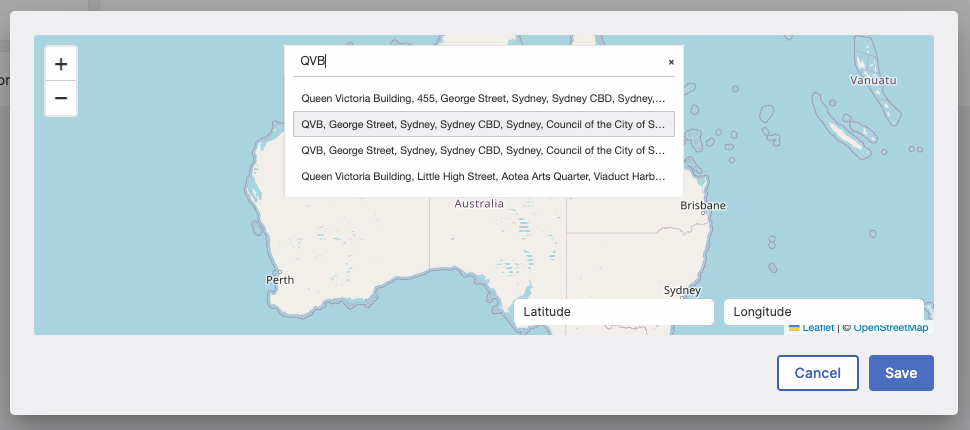
You'll be presented with a map. Simply long-press on the point of the map in order to place the map pin representing the camera's position.
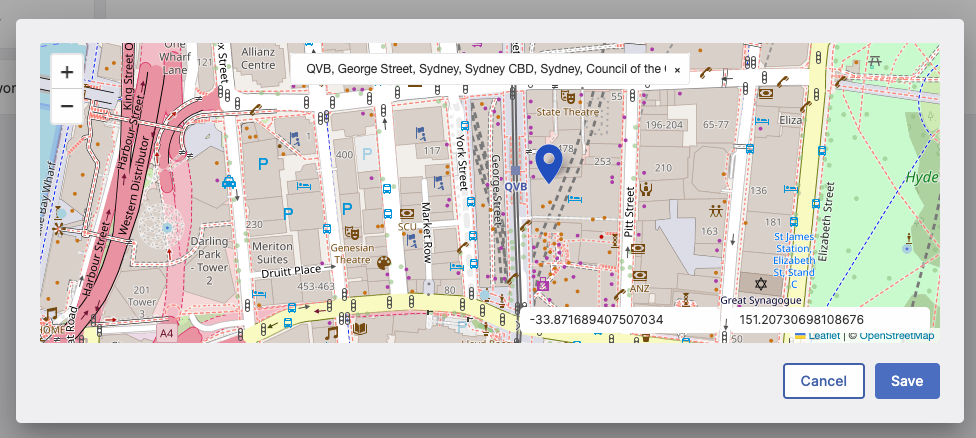
Note: You can also add in Latitude and Longitude manually if you have that information.
Uploading
If you're uploading files (as opposed to importing them), you'll see a button titled Start Uploading Files. Click this to start the upload process. You'll see a progress bar, indicating how much of the footage has been uploaded into VisualCortex.
Note: Uploaded footage can take several minutes to get ready, while VisualCortex scans the files for threats and normalises the video.